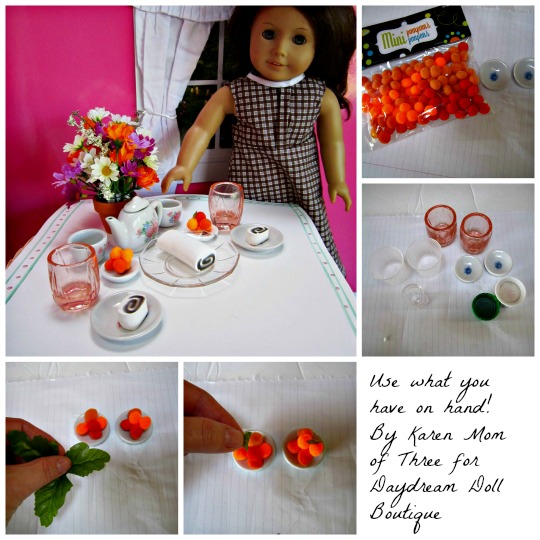
The most amazing thing happens when you pull out a box of Sculpey Clay and let the kids get to work. Last night my niece and her friend who are staying with me for a few weeks this summer got the chance to make their own doll food out of Sculpey clay.
Trinity my niece is now almost 10 and she and I made doll food together on a previous visit she had with me during my first year blogging. She an her friend spent two hours making special treats for their dolls and created summer memories that will last a life time.
Even my son Alex joined in, though he prefers making Angry Bird sculptures with his Sculpey Clay.
I highly recommend this product and picking it up when ever it goes on sale at your local craft store you can make so many wonderful things for your dolls, yourself and your friends. I would love to see what you make with your Sculpey so share a photo with me! Email me at karenmowen@gmail.com
As with all my posts I would love to hear from you so please leave me a comment here or email me at karenmowen@gmail.com
Welcome to our blog! We here at Karen Mom of Three's Craft blog are passionate about doll play. We love our dolls big and small and creating for them. Our passion is sharing what we know with those who love dolls or who have a doll lover in their lives. We are pleased to have you join us and we hope you share with a friend.
Showing posts with label sculpey clay. Show all posts
Wednesday, July 15, 2015
Monday, September 22, 2014
Let's Have Cupcakes...craft, make or to buy!
Cupcakes are such a wonderful addition to any doll play collection and today I am thinking about Cupcakes for dolls and their girls!
I have made many of these cupcakes for my nieces as crafts to share in the dolly world and written about cupcakes for dolls on Etsy. Today I am sharing with you how you can bring more cupcakes into your doll play by making some like from my tutorials (Click here to see how to make your own for your dolls) or from the tutorial links provided below or by purchasing some ready made on Etsy. As well as how to incorporate doll cupcakes with real cupcakes for a birthday party or tea party.
For a very small investment in some oven bake polymer clay such as Sculpey from your local craft store you can make your own doll sized treats from my tutorial
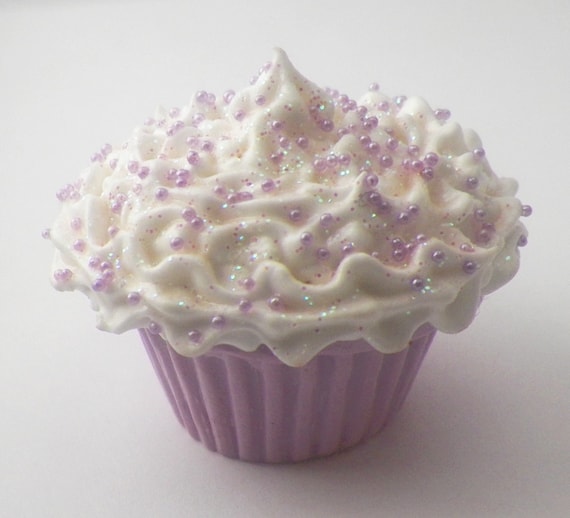
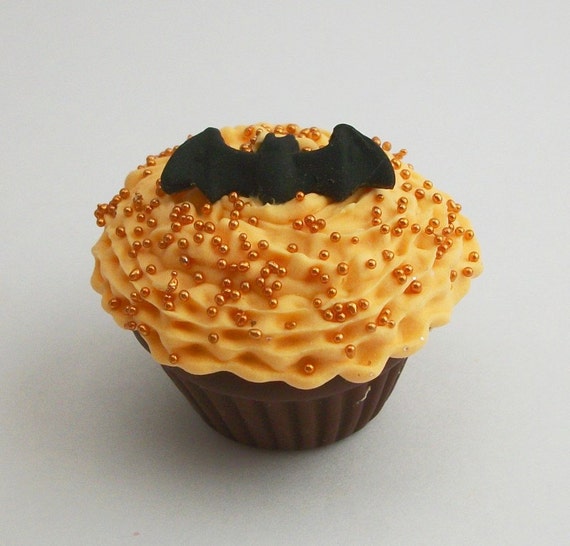
A while back a reader introduced me to Jessie Raye's Etsy Shop and her cupcakes are some of my most favorite doll sized treats to order and send to friends and family. This cupcake is one of my favorite's I love the soft colors and the way it sparkles. Offered at $3.99 this is a true delight for a doll lover and these wonderful treats fit perfectly in a Halloween treat bag, Loot bag or Dolly Advent Calender and Stocking.
Jessie Raye has a wonderful assortment of dolly cupcakes you can buy one or you can buy a bunch, she is great with custom orders as well click here for her shop and let her know I sent you!
For those of you talented with a hook why not try crochet for dolly cupcakes. I wish I had this talent these are fantastic and this free pattern is from HooksandYarn's Blog Click here to find out how you can make your own! Once you figure out how to make these girl sized treats try to make a smaller version and share with the dolly's too!
For those of you like me that are a fan of two sticks...ie Knitting how about this fun free pattern click here for free pattern from knittingpatternsgalore!
For those of you who sew check out this wonderful tutorial for making felt cupcakes. These look good enough to eat! Click here for instructionables.com directions
I do hope that today's post has not given you O.C.D but if it has I would love to see what you make! Be sure to email me a photo at karennmowen@gmail.com
Labels:
crochet,
Cupcakes,
Etsy,
Felt,
Jessie Raye,
Knitting,
sculpey clay,
Sewing
Saturday, February 1, 2014
Craft Along With Me 2014- February Make Your Dolls Some Valentine Cookies With Sculpey Clay
![]() |
| Bake and Serve your Doll Cookies in Under 1 hour start to finish with this Sculpey Craft Tutorial from Karen Mom of Three! |
It is February 1st and time for our 2nd Craft Along with Me Project. I have created a very simple doll Valentine Cookie made from Sculpey Clay. If you have never worked with Sculpey Clay this is an easy and very fun way to create doll sized treats for your doll play collection. You can make as many as you would like for the fraction of the cost of commercially made doll treats and you get so much value from what you create.
-Sculpey Clay in your choice of colors, I used a light tan and red from my Bake Shop Variety Pack
-A Heart Shaped Premo! Crinkle Cutters I Used the Heart Shape
- A mini metal cutter heart shape from thePremo! Basic shapes pacakge
-A Sculpey Clay Mat or wax paper for covering your work space and baking
-A oven safe baking sheet
-The Sculpey Clay Tool Set
-Your Oven
Step 1- Assemble all your supplies and cover your workspace. I love the Sculpey Clay Mat you can roll out your clay on it, wipe it down easily and it can even go in the oven. Before I had the mat I would use wax paper or parchment, this is a great product because I can use it time and time again.
Step 2- Preheat your oven to 275 F.
Step 3- On your Sculpey Mat or covered work space roll our your cookie base color. I rolled mine out so that it was 2 mm thick. Use your larger Crinkle Cutter to cut out your cookie based shapes.
Step 4- Cut out as many cookies as you desire. I set out to make 6 cookies, I got 5 from the rectangle or clay I used. Then I rolled the renaming clay and cut one more. (I could have made 8 from the clay). I used the tools to help lift the clay out from between the cut out clay shapes.
Step 5- Select your accent color, I chose the red from my Bake Shop Package and I rolled it out as I did the cookie base. Then I selected the mini heart from the mini cutters.
I cut out 6 small hearts and used the tools to help me lift the mini hearts up and place them in the center of my doll cookie base, I pressed them into place very gently and they were ready to bake!
Step 6- Then I placed my mat on the baking sheet and baked the doll cookies for just under 10 minutes. I let them cool completely and removed them from the sheet and on to dolly's plates for the dolly tea party with my niece!
I hope you will Craft Along With Me this month! Remember to email me a photo of your Sculpey Creations this month to karenmowen@gmail.com. You can make any doll food you would like for your dolls using Sculpey Clay. Sculpey Clay is an easy, fun and affordable add to your doll play collections, makes great gifts, Advent or Holiday doll treats as well as great party favors!
Tuesday, December 24, 2013
It's Christmas Eve! My Third Blog Aniversary!
How the time does fly! It is Christmas Eve. How does this happen? Every year it seems we plan and anticipate, scheme and prepare and yet it sneaks up on us year after year. This is such a special time for me, for my family and my blog and I thank each and everyone of you who has followed along this season, read my blog, stumbled on to us on Facebook, Pinterest or Blogger.
Not only is it Christmas Eve but it is also my blog's Third Anniversary. I began this blog Three years ago on a whim. I started this blog at the suggestion of strangers, who would later become treasured friends, that I had met through FB about sharing my doll sewing and craft adventures. I honestly never thought anyone would read it outside my own family. I could never have imagined the way this blog would change my life.
Three years ago a life I could not have imagined for myself began to unfold and each and everyone of you is a part of that journey. I want to thank you for stopping by, for what ever lead you here. Your words, comments and emails have been so encouraging, thoughtful and kind. It is for each one of you who took the time to let me know you were out there reading and enjoying my work that I continue to write, create and share.
A Special Thank you to Brandy, Madelon, Jessica T for the ideas, crafts and fun finds you have shared with me so that I can share with our readers. Thank you to Deena of Deena and Beena You tube and Lauren M for your wonderful Dolly Friendship. Thank you also to Kathryn at Daydream Doll Boutique for giving me another place to share my doll play ideas and crafts.
A Very Special thank you to Char at Doll Diaries, Anna at Doll it Up and Laura Kelly of Laura Kelly Designs who have included me on the most fantastic and creative teams I could have every dreamed of belonging too.
Thank you to all the wonderful Etsy Shops who have let us have a behind the scenes look at their passion and their work, the pattern designers who give me sneak peeks so that I may share my true opinions of their work with all of you. Thank you to Springfield Collection and Fiber Craft for creating a line of amazing dolls and products that truly helps put doll play in the hands of those who could not previously attain quality doll play items. Thank you to Canada's Maplelea for including us this year their in their 10 year anniversary and sending me their Set To Celebrate Party Set!
I would also like to thank the companies of Sculpey Clay, Buttons Galore & More, Rit Dye and Rit Studio, Coats & Clark, Red Heart Yarns, Plaid and Folk Art and Laura Kelly Designs for allowing me to share their amazing products with you and helping me to create wonderful doll play items for you, my nieces, my doll swap partners and my family.
Today I am so very thankful for all of you and hope you will join us for more doll play in the coming days and new year.
If Christmas is a holiday you and your family celebrate then I wish you a Very Merry Christmas and look forward to sharing more with you soon!
As with all my posts I would love to hear from you so please leave me a comment here or email me at karenmowen@gmail.com
Labels:
Buttons Galore & More,
Christmas,
Coats & Clark,
Deena and Beena,
Doll Diaries,
Etsy,
Karen Mom of Three,
Laura Kelly,
Maplelea,
Red Heart,
Rit Dye,
Rit Dye Studio,
sculpey clay,
Springfield
Friday, November 29, 2013
Sculpey Clay Tiny Ornament Blog Hop- Christmas Cupcakes That Double As Doll Treats!

Today I wanted to share a tutorial with you using Sculpey Clay that you can use as Doll Treats or as an ornament!
To create your own Sculpey Clay Cupcakes, Ornament and Ornament Hanger you will need:
-Sculpey Clay in Brown, White and Red
-Wax Paper
-Tooth Picks
-18 gauge wire or a paper clip
-Needle nose pliers
-A baking pan
-An oven
-A craft or butter knife
Step 1- Cover your work space with a sheet of wax paper. Use your craft knife to divide your brown Sculpey Clay into 8 pieces. Roll into balls.
Step 2- Take the rolled balls and shape them between your fingers into a "cupcake bottom" shape, similar to the "candy rolo", as shown in the photos above.
Step 3- Use a tooth pick to make the indentations for the cupcake wrapper. Gently press the tooth pick into your Sculpey clay, all the way around the cupcake bottom.
Step 4- Tear off a fresh sheet of wax paper from the roll and cover the surface you will be working on. This way the color from the cupcake bottom will not transfer to your white Sculpy clay.
Step 5- Break up your white Sculpy and roll it into a long thin snake shape.
Step 6- Roll up your snake shape so it looks like a "soft serve ice cream or piped icing"
Step 7- Press the "icing onto the cupcake bottom" and repeat on your remaining "cupcake bottoms".
Step 8- To make your cupcakes an ornament to hang on your tree you will need to use your pliers to cut away a 1 1/2 inch piece of 18 gauge wire (or you can use a paper clip, unfold it and twist it like the photos shown above).
Step 9- Twist the wire with your fingers or the pliers to create a loop, insert the twisted wire end into the top of your cupcake. Leave the loop exposed. Press the Sculpey clay around the wire slightly.
Step 10- Roll a small amount of red clay between your fingers to create a cherry. Press the "cherry" between the wire loop as shown in the photos above.
Step 11- Roll a very thin snake shape of red Sculpey clay to create sprinkles. Use your craft knife or your finger nails to create " sprinkles" from the red clay snake. Gently press into your cupcake's icing.
Step 12- Rrepeat on your remaining cupcakes.
Step 1- To create an eye catching "peppermint candy" ornament hanger for your cupcake you will need to cut away 6 inches of wire from your spool.
Step 2- Make a snake from both red and white Sculpey clay. Then roll them together as shown in the photos above.
Step 3- Cut away small pieces and roll into "peppermint candy beads".
Step 4- Feed "three beads" onto the middle of your wire, use your pliers to round the edges as shown in the photos above. Create as many of these wire peppermint candy holders as you would like!
Now it is time to bake your Sculpey Ornaments, Doll Treats and Peppermint Candy Ornament hangers.
Line your baking sheet with wax paper and preheat oven to the recommended setting on the side of your Sculpey clay package. Bake your Ornaments, Doll Treats and Peppermint Candy Ornament hangers according to the thickness you have created them at and the directions on the Sculpey clay package.
Remove from the oven when baked and share with the ones you love!
Today I used clay from Sculpey I purchased at Michael's the craft store. I was surprised at how much softer and easier it is to work with then the store brand I usually buy. Today I photographed my Sisterhood In Town 18 inch doll Daniela on my American Doll Room. Christmas Tree from Walmart. The table used is one I created for my Tutorial on Doll Diaries click here to view how.
As with all my posts I would love to hear from you so please leave me a comment here or email me at karenmowen@gmail.com
document.write('
Wednesday, November 27, 2013
Happy Hanukkah
This year Hanukkah is celebrated from November 27 to December 5th. As the sunsets today I wish you and your family a very Happy Hanukkah!
From all of us hear at Karen Mom of Three's Craft blog.
To learn more about Hanukkah from previous posts here on my blog type in Hanukkah in the search engine or click here
Hanukkah Poem from 123holiday.net
Let's be HappyMalvine P. Hoenig
Let's be happy, let us cheer,
Hanukkah again is here.
All the lights are shining bright,
Isn't it a lovely sight?
You know these lights remind us
Of the time long, long ago,
When God caused one,
tiny light,
for eight long days to shine so bright.
As with all our posts we would love to hear from you so please leave us a comment here or email us at karenmowen@gmail.com
Friday, March 22, 2013
Make Your Own Penny Pincher Birthday Play Set
Some of you know I create and write for Doll Diaries but did you know I also create and write by-weekly for Daydream Doll Boutique's Blog?
I write the Make it Monday column offering doll crafts you can easily make.
Recently I made my version of the currently back ordered Kit's Birthday Set shown below
American Girl has this $65 set on back order until June 14th at the moment so I wanted to make my own.
To see how I made my version pop on over to Daydream Doll Boutique by clicking here and let me know what you think about my version of Kit's Penny Pincher Birthday Set!
As with all my posts I would love to hear from you so please leave me a comment here or email me at karenmowen@gmail.com
Monday, April 25, 2011
Make a Chocolate iced or dipped Doughnut for your doll
You may have noticed that I like to work with polymer clay. If you have never worked with it before you should not be intimidated by it. I was for the longest time. If you are thinking of trying some oven bake polymer clay food for your doll it is best to start off with projects you are going to succeed with like some of the projects here on my blog. The Chocolate dipped or iced doughnut is really easy to make and requires very little effort and is a great starter project. To make these doughnuts I used beige and chocolate brown clay. I use craft smart from Micheals as it is the easiest to work with I find and is usually the least expensive, the colors are great and stay true to the colors I am expecting.
These doughnuts are great for making at birthday parties or sleepovers.
To make a pair of large doughnuts for your doll I would use 1/3 of a block of beige for each doughnut. Roll the clay into a long sausage and shape into a circle, smoothing the creases with your fingers. Set aside. Next use a small amount chocolate brown clay and flatten it between your fingers, you can do this to create a layered effect of the icing or you can make a ball flatten it and put your finger through it for the center of the doughnut and layer the icing on top.
I used left over pink to create sprinkles for one of the doughnuts for added cuteness!
As with all my posts I would love to hear from you so leave a comment here or email me at karenmowen@gmail.com
Sunday, April 24, 2011
Make your doll an Eclair or "Long John" doughnut for your doll
I love it when Polymer Clay goes on sale at the craft store. Here is another really easy and fun pastry to make for your doll. I also love Eclairs (AKA Long John Doughnuts) and these are about the easiest things to make with polymer clay. I used beige and chocolate brown. Make a log out of the biege as shown in the photo above. Mine is 2 inches long. Next I used a really small amount of the chocolate brown and made the icing. I flattened a very small amount of clay between my fingers and trimmed it to fit the top of the Eclair.
Bake the clay to the manufacturers instructions. These will make a great addition to your doll food collection.
**TIP To remove the thumb prints from your icing, flatten the clay between wax paper and your fingers.**
Tomorrows post will also be a polymer clay craft a chocolate dipped or iced doughnut, also a really easy and fun doll food to make!
As with all my posts I would love to hear from you so leave me a comment here or email me at karenmowen@gmail.com
Monday, April 18, 2011
Make your doll a "Chocolate Bunny" and other treats out of polymer clay
** Tip ** If you do not have any moulds a great time to get them is after the holidays when they go on sale.
I also thought it would be fun to have lolly pops in the baskets as well as eggs. These should not be given or made for anyone under 3 as they can be a choking hazard.
To make the lolly pops I rolled colored clay into thin sausage or snake shapes and rolled or coiled them up and stuck a tooth pick in them. I trim the toothpicks sharp end after baking.
To make the eggs I used left over colors and rolled them together to get a marbled effect. With all polymer clay work you should work over wax paper and wash your hand between colors as some of the color will come off on your hands and your work space. Always bake the clay to the manufactures recomendations.
These are great for not only Easter but would make a great addition to any doll food collection. They are also great as party activities or loot bag treats.
As with all my posts I would love to hear what you think so please leave me a comment here or email me at karenmowen@gmail.com
Tuesday, April 12, 2011
Make your doll a Croissant !
Make these easy croissants for your doll out of oven bake polymer clay. This is one of the easiest things to make for your doll. Using beige clay work the dough and roll it into a log. Then make indents in the clay, making the center marks resemble a triangle.
Then add more markings and bring the dough "arms" in.
Bake in the oven at the temperature recommended by the manufactures.
These are so much fun to make and easy. They make a great addition to any doll food collection and any doll menu!
As with all my posts I would love to hear from you so please leave a comment here or email me at karenmowen@gmail.com
Subscribe to:
Posts (Atom)