Showing posts with label Rit Dye Studio. Show all posts

Friday, January 17, 2014

Make Your Own Dolly And Me Valentine Pilllow Cases! A Craft Tutorial By Karen Mom of Three

Valentines Day is just under a month away and I thought it would be fun to do a tie dyed pillow case for Dolly & Me. To create your own you will need:
-A dollar store white or light colored pillow case
- A doll sized pillow case made from a dollar store pillow case  (fabric, sewing machine, iron,etc)
-Rit Dye in colors of your choice,  I used Tangerine and Cherry Red
-Twist ties or elastics
-A bucket to dye your pillow cases in
-Large Spoon to stir
-Dish soap
-Salt
-Sharpie or Fabric Marker
-Cardboard to slip into the pillow case before your write on it
Step 1- Sew yourself a doll sized pillow case. I used one of the dollar store pillow cases and cut the fabric so that it measured 10 inches X 16 inches. Fold one of the 16 inch sides over by 1/2 inch and iron, then one inch and iron. Next sew a straight line making the edge of the pillow case.  Next  fold with right sides together and sew two sides of the fabric leaving the edge you created open to slide a doll sized pillow into.

Step 2- Take your dollar store pillow case and the doll sized pillow case to the sink and get them really wet. Next use twist ties or rubber bands to tie off the fabric, do it tightly these will leave white marks in the fabric.

Ste 3- Prepare your dye bath as per the directions on the Rit website shown below.
  1. Fill sink or bucket with enough hot water for fabric to move freely. Remember: Use 1 package of Rit powder or 1/2 bottle of Rit liquid dye and 3 gallons of hot water for each pound of fabric. Pre-dissolve powder in 2 cups of hot water. Add pre-dissolved powder or liquid to dye bath. Stir to mix.
  2. Wet fabric in hot water. Uncrumple and add to dye bath.
  3. Stir constantly (back and forth, up and down) for 10 to 30 minutes.
  4. Rinse in warm water, then gradually cooler water until water runs clear. Wash item in warm water with mild detergent and rinse thoroughly in cool water.
  5. Dry item in dryer or air dry.
  6. Clean sink or bucket immediately with chlorine bleach or scrub with chlorine-based powder, liquid, or gel cleanser.

Sunday, January 12, 2014

Tea Time Dolly & Me Tea Gloves Tutorial

If you know me at all you know I love tea. Tea Cups and Saucers, lose leaf tea are a large part of my dady and I set out to create dolly and me tea gloves for my niece Thea and her doll for our Thursday tea party.
I set out to dye some gloves I ordered on Ebay and I made some dolly size gloves using the free pattern from the craft along with me January 2014 click here for link to the pattern. *I added one inch to the end of the gloves to make them longer for tea. Click here for my version  PDF Pattern for the Gloves I made

My goal was to create yellow tea gloves to match my tea set for Thea and her doll. What I did not realize at the time was that the gloves I ordered and the fabric I used to create the doll gloves were not 100% Cotton but rather polyester blends and they did not take the color as I had hoped but the end result is a warm soft champagne yellow and in the end I got perfect dress up tea gloves for Dolly & Me.
 I used the stove top method from the Rit Site
  1. Fill pot with enough hot water for fabric to move freely. Remember: Use 1 package of Rit powder or 1/2 bottle of Rit liquid dye and 3 gallons of hot water for each pound of fabric. Pre-dissolve powder in 2 cups of hot water. Add pre-dissolved powder or liquid to dye bath. Stir to mix.
  2. Wet fabric in hot water. Uncrumple and add to dye bath.
  3. Bring dye bath to simmer. Stir constantly (back and forth, up and down) at least 30 minutes.
  4. Rinse in warm water, then gradually cooler water until water runs clear. Wash item in warm water with mild detergent and rinse thoroughly in cool water.
  5. Dry item in dryer or hang to dry.
  6. Clean containers immediately with chlorine bleach. Scrub with chlorine-based powder, liquid, or gel cleanser, if necessary.
Now it is time for tea!
I hope you enjoyed today's craft tutorial and that you will give Rit Dye's A try, I am so enjoying adding Rit Dye to my crafts and I can not wait to share more ideas with you soon. Check out more of my crafts using Rit Dye by visiting my Rit Dye Studio by clicking here.
As with all my posts I would love to hear from you so please leave me a comment here or email me at karenmowen@gmail.com

Tuesday, January 7, 2014

Make A Coffee Filtter Princess Tutu For Your Dolls

Using Rit Dye has become one of my most favorite craft tools! Today I wanted to show you how you can make your dolls a princess tutu using coffee filters, dye and duct tape!
To make your own you will need:
-three coffee filters ( I used the kind I found at the dollar store)
-Rit Dye (I used Cherry Red and Purple)
-Duct Tape ( I get mine at www.consumercrafts.com)
-A Button ( I use Laura Kelly Buttons from Buttons Galore & More)
- A needle and thread
- A roll of Tulle
-Scissors 
-Your Doll Today I used my Springfield Doll Madison
-A Measuring tape
 Step 1- Dye your coffee filters. I dyed mine with left over dye from other projects. I keep my left over dye in jars that way I can re heat and use the colors for other projects. Simply I splash dyed and dipped and rinsed my coffee filters, then let them dry.

Step 2- Once dry I selected two coffee filters and folded them in half. then I cut along the edge giving me 4 half circles. I only needed three for my tutu but you can add the fourth if you would like.

Step 3- Cut 12 inches of duct tape from your roll and lay the tape sticky side up on the table.
Step 4- Gather the flat cut edge of your filter as shown above and press them into the bottom edge of your tape on the table, space them evenly.


Step 5-  Once the coffee filters are in place, unroll and cut 36 inches of tulle from the roll. Gather with your fingers and press into place half way up from the bottom edge and all along the length of the tape.
Step 6- Fold over the sticky edge of the remaining tape and press down along the gathers.
Step 7- On one edge of the tape waist band measure 1 inch in from the raw edge and sew your button into place. Once secure us a stitch ripper to make a button hole one inch in from the opposite raw edge of the tape waist band.
Now your tutu is ready for your doll to wear!
You can do so much with Rit Dye and so many wonderful things with coffee filters. I hope you enjoyed today's craft and that you will give dye crafts a try! Like me I know you are going to get hooked!
As with all my posts I would love to hear from you so please leave me a comment here or email me at karenmowen@gmail.com

Wednesday, January 1, 2014

Dolly Shoe Lace Make Over A Karen Mom of Three Rit Dye Craft Tutorial

Today I wanted to share with you a craft I have been meaning to try since my shipment of Rit Dye arrived! Today I will show you how to add some personality to your dolls shoe laces with Rit Dye!

To create your own you will need:
-Your dolls shoe laces, removed from your dolls shoes, ( I used my Springfield Doll Shoes and a pair of My London Girl Trainers.)
-Liquid Rit Dye I used Purple and Cherry Red
-Salt
-2 Cups Hot Water 
- A jar to hold your water, dye and salt
-Plastic Spoons
-Plastic Gloves
-Measure cups
Step 1-  Prepare your dye solution I had a jar of Cherry Red Liquid Dye mixture made up already from a previous project ( I keep my left over dye for fun and easy quick dye projects from paper to fabric!) and then created one for the purple dye. Into a large jar I put two cups of very hot tap water, 1/2 bottle of purple liquid Rit Dye, 1/2 cup of salt. Use a plastic spoon to stir it all up. For the Cherry Red dye I re heated the dye water mixture in the jar for 2 minutes in the Micro wave on medium heat.
Step 2- Place the laces into the jars of dye. Use your spoon to make sure they are submerged.

Step 3- Use your plastic spoons to give a stir to your laces every few hours. I left mine in the jars for 6 hours, the longer you leave your laces the darker the colors will be.

Step 4- After you have left them for a few hours remove them from the jars. I used coffee filters to "dry the laces" when I removed them from the jar, this way I can use the coffee filters in another craft later. Let the laces dry, to speed up the time you may wish to place them in the dryer or heat set them with a hair dryer. I am thrilled with how mine turned out. Once dry re lace your shoes and put them on your dolls!
Today I used my Doll Hannah who is an Extra Special Doll (formally Dolls for Downs) shown in the photo on the left hand side and her best friend Jillian My American Girl Doll ( A just like you doll)
Hannah is wearing the shoes from one of My London Girl dolls. Jillian is wearing shoes from Springfield Doll Collection.
I hope you enjoyed today's craft tutorial and that you will be inspired to try dye crafts in your doll craft time!
As with all my posts I would love to hear from you so please leave me a comment here or email me at karenmowen@gmail.com


Tuesday, December 24, 2013

It's Christmas Eve! My Third Blog Aniversary!


How the time does fly! It is Christmas Eve. How does this happen? Every year it seems we plan and anticipate, scheme and prepare and yet it sneaks up on us year after year. This is such a special time for me, for my family and my blog and I thank each and everyone of you who has followed along this season, read my blog, stumbled on to us on Facebook, Pinterest or Blogger.


Not only is it Christmas Eve but it is also my blog's Third Anniversary. I began this blog Three years ago on a whim. I started this blog at the suggestion of strangers, who would later become treasured friends, that I had met through FB about sharing my doll sewing and craft adventures. I honestly never thought anyone would read it outside my own family. I could never have imagined the way this blog would change my life.


Three years ago a life I could not have imagined for myself began to unfold and each and everyone of you is a part of that journey. I want to thank you for stopping by, for what ever lead you here. Your words, comments and emails have been so encouraging, thoughtful and kind.  It is for each one of you who took the time to let me know you were out there reading and enjoying my work that I continue to write, create and share.


A Special Thank you to Brandy, Madelon, Jessica T for the ideas, crafts and fun finds you have shared with me so that I can share with our readers.  Thank you to Deena of Deena and Beena You tube and Lauren M for your wonderful Dolly Friendship.  Thank you also to Kathryn at Daydream Doll Boutique for giving me another place to share my doll play ideas and crafts.


A Very Special thank you  to Char at Doll Diaries, Anna at Doll it Up and Laura Kelly of Laura Kelly Designs who have included me on the most fantastic and creative teams I could have every dreamed of belonging too.


Thank you to all the wonderful Etsy Shops who have let us have a behind the scenes look at their passion and their work, the pattern designers who give me sneak peeks so that I may share my true opinions of their work with all of you. Thank you to Springfield Collection and Fiber Craft for creating a line of amazing dolls and products that truly helps put doll play in the hands of those who could not previously attain  quality doll play items. Thank you to Canada's Maplelea for including us this year their in their 10 year anniversary and sending me their Set To Celebrate Party Set! 


I would also like to thank the companies of Sculpey Clay, Buttons Galore & More, Rit Dye and Rit StudioCoats & Clark, Red Heart Yarns, Plaid and Folk Art and Laura Kelly Designs for allowing me to share their amazing products with you and helping me to create wonderful doll play items for you, my nieces, my doll swap partners and my family. 
Today I am so very thankful for all of you and hope you will join us for more doll play in the coming days and new year.
If Christmas is a holiday you and your family celebrate then I wish you a Very Merry Christmas and look forward to sharing more with you soon!
As with all my posts I would love to hear from you so please leave me a comment here or email me at karenmowen@gmail.com

Sunday, December 15, 2013

Check Out Rit Dye Studio!


I recently have joined the Rit Studio Team and I am having such a blast! Currently 5 of my Rit Dye Crafts from around the dolly world are published and on the site joining some wonderful dye projects from Anna of Doll It Up. Com, Char from Doll Diaries and Laura Kelly from Laura Kelly Designs.com
Click on the Rit Dye Studio Page under Arts & Crafts to see all our Doll Crafts posted together!
We have all been putting together some of our favorite doll craft holiday ideas and using Rit Dye to enhance our crafting experiences!
 I never knew how easy it is to use Rit Dye in my crafts and I wished I had started working with dye so much earlier! I love how easy it is and how much I can do with it!
There are currently a dozen doll crafts on the Rit Studio Doll Craft page with more being added weekly, I hope you will stop by and see what we are up too!
Rit Dye is for more then just fabric! Paper Crafts and Wood love Rit Dye too!
I hope you will Click here to be taken to our Rit Studio Doll Craft Page!  I will be adding another special craft tomorrow to the site! I hope you will check back often!
As with all my posts I would love to hear from you so please leave us a comment here or email us at karenmowen@gmail.com

Wednesday, December 11, 2013

Tandem Dye A Diaper Shirt For Your Bitty Baby A Rit Dye Tutorial By Karen Mom of Three

Forgive the shiny light reflection in the photos from today's post. As I was photographing this last night I ran out of light but could not wait to share with you my tutorial for a tandem dye diaper shirt. 
To dye and create a holiday diaper shirt your own Bitty Baby Diaper shirt you will need:
-A 5lb Baby Diaper Shirt I got mine at Sears
-Two Jars
-4 to 6 Cups of Hot Water
-1/2 cup of salt
-A squeeze of liquid dish soap for each jar
-A Plastic Craft Spoon
-Gloves
-Sink to rinse your diaper shirt
-A timer
-A dryer
-A Fabric Remnant Shape (I used a Cupcake)
-Needle and Thread
I called this Tandem Dyeing as I am an impatient crafter and I wanted to have this done before dinner. I started by adding 4 cups of hot water to my large jar and 2 cups to my smaller jar, I added salt, and liquid dye to each jar, I also added a quick squirt of liquid dish soap and stirred the jars separately. I wet the diaper shirt under the tap and then placed the top of the shirt in one jar and the bottom half in the other. I used the spoon to make sure that the shirt was submerged. I left the middle to be plain.
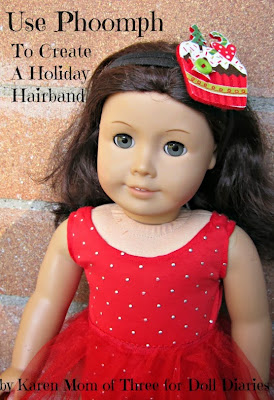
I set my timer for 1 hour and went to work on the embellishment. I used Phoomph for fabric from Coats and Clark, I love this product. It helps give a 3D look to my crafts. I cut out a rough shape of my cupcake from my remnant fabric and then a similar shape from the sheet of Phoomph. I peeled back the backing on one side and lay my fabric on the Phoomph. I then cut out the cupcake shape and the bonus cookie and heart shape too!

I then  found some of my favorite little Laura Kelly buttons and layered them on the Phoomph. Once I had an idea of where I wanted the heart and the cookie shape to go on my cupcake, I thread the needle and sewed the buttons to the heart and then the hear to the cupcake wrapper. I added the star cookie as well.

When the timer went I rinsed the diaper shirt and set it in the dryer. Once dry I attached Cupcake to the diaper shirt. I peeled the back from the other side of the cupcake Phoomph and pressed it into place. I then used my needle and thread and sewed the cupcake into place.
Now our Bitty Baby has a new Holiday Diaper Shirt for when my niece Thea comes to tea on Thursday! I love working with Rit Dye!
I hope you enjoyed today's Tutorial and I look forward to sharing more doll crafts, ideas and fun finds with you soon!
As with all my posts I would love to hear from you so please leave me a comment here or email me at karenmowen@gmail.com

Monday, December 9, 2013

The 8 Minute Holiday Dress Re-Fresh With Rit Dye and Karen Mom of Three

Recently I was sent some Rit Dye to try out. I have to admit I was very nervous to try this never having dyed anything in my life.  I will say this was so easy and fun and I find myself looking at my doll items in an entirely new way.
A few years ago I was sent this handmade white sparkle dress in a doll swap I did and when I got the Rit Dye Shipment I thought I wonder if I can make that white dress feel fresh and new again for the holidays.  I was so thrilled with how the dress turned out I thought I would share the tutorial with you. You will see just how easy it is to use Rit Dye and breath new life into your old holiday dresses and doll play items.
To create your own Rit Dye items you will need:
-Rit Dye color of your choice. I used Cherry Red
-1 cup of Salt
-Measuring cups both wet and dry
-A bucket ( I used a recycled ice cream bucket)
-A Metal Spoon
- 1 squirt of liquid dish soap
- 4 cups of Hot Tap Water
-Something from your doll play collection to dye *With a parent's permission of course!
-A dryer or line with clothes pegs to hang your items to dry
-Paper or plastic to cover your workspace
-Rubber Gloves
-A timer

Step 1- Select your item of clothing to dye. If you are worried about how this will turn out try a pair of white socks first!
Step 2- Gather everything you will need from the list above
Step 3- Cover your work space and place on top your bucket filled with 4 cups of hot water
Step 4- Add 1/2 the bottle of your Rit Dye, 1 cup of salt, a squirt of liquid dish soap and use your metal spoon to stir all the ingredients together.
 Step 4-Wet your dress underwater and then place your dress or doll play item in the Rit Dye mixture. Put on rubber gloves and soak your item making sure it is covered with the dye mixture.
Step 5- Set your timer. I set mine for 8 minutes, not having done any fabric dying before I wanted to see what color I could achieve in under 10 minutes.
 Step 6- After 8 minutes I removed the dress from the dye and rinsed it under cold water until the fabric rinses clear.
Step 7- Line Dry or Machine Dry the dress completely. Dress your doll in her new Holiday Refreshed  Style!

I love how this dress turned out and had I left the dress in the dye longer it would have become a much darker cherry color. I am thrilled with the color and know my nieces are going to be surprised at the new Holiday Dress my Sisterhood in Town doll Lily will be wearing at our next holiday tea party.
Rit Dye is easy and fun to use. It gets the Karen Mom of Three stamp of approval!
I would love to see what you make with Rit Dye so be sure to email me a photo of your completed projects to karenmowen@gmail.com
As with all my posts I would love to hear from you so please leave me a comment here or email me at karenmowen@gmail.com 

Tuesday, December 3, 2013

Check Out My Rit Dye Experiment! An Infinity Scarf Tutorial For Your Doll!

I was recently sent some Rit Dye to try and I have to say I am now obsessed! Anything I now see white I will tell you I am looking at and thinking about what I can do to it to make and dye something new for my dolls. Giving myself a 90 minute window to create this craft I set out to see what I could make in this time frame.
Today I share with you my experimental tutorial so you can try it out as well!
To make your own dolly infinity scarf you will need:
-Rit dye (I used Cherry Red)
-A glass jar
-1/4 cup salt
-2 cups hot tap water
-A squirt of dish soap
-A spoon
-A measuring tape
-A pair of scissors
-Stretchy fabric like Jersey or cotton I had some left over skulls and cross bone fabric I thought would look great dyed a Cherry Pink-Red
-Sewing Machine
-A timer
-Rubber gloves

Step 1- Cut your fabric so that it is 20 inches long and 5 inches wide
Step 2- Assemble everything you will need to Jar dye your scarf
Step 3- In your jar place 1/4 cup of salt, 1 squirt of dish soap, one cap full of liquid Rit Dye
Step 4- Add 2 cups of hot tap water
Step 5- Use your spoon and stir until the salt is dissolved
 Step 6- Place your strip of material into the jar and use your spoon to make sure it is covered. Cover it with the lid, shake if you would like and let sit. I let mine sit one hour. Set your timer, if you want a darker color let it sit longer!
 Step 7- Remove the fabric from the jar. Cap the jar and save for another project or more material as their is enough dye for many projects!
Step 8- Rince the fabric under cold water until it runs clear. I heat set my fabric in the dryer.
Step 9- Once dry, match the short ends with right sides together as shown in the photo above and stitch the ends together. Trim and turn right side out.
Step 10- Stretch your loop of fabric as shown in the photos above and then twist and loop as shown.
Place over your dolls head and use as a scarf, or use as a hair band!
I am so thrilled with how this turned out and how easy this Rit Dye method is. This would be a great project for a doll themed party or sleep over craft, I would sew the scarfs first and let the girls pick their colors! Once the dye is set and the item dried this makes a great take home accessory.
I can not wait to try more doll items created with Rit Dye!
As with all my posts I would love to hear from you so please leave me a comment here or email me at karenmowen@gmail.com